How to Connect Replug with Zapier?
Now with Replug and Zapier integration, you can connect thousands of applications and automate your workflows. Connecting Replug using Zapier brings efficiency in performing various tasks through automation.
Steps to connect Replug with Zapier?
To connect Zapier to Replug, you need to sign in to Zapier.
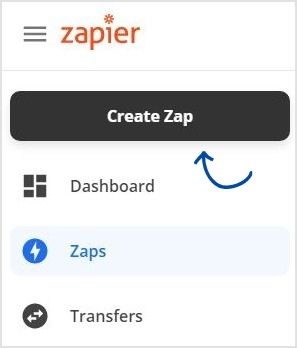
Step 1 Create a Zap
Click on “Create Zap”.
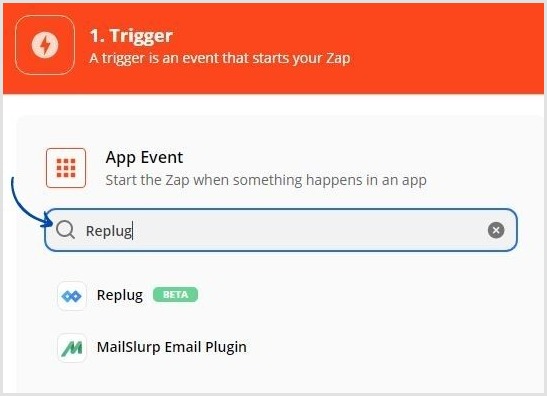
Step 2 Choose Trigger App
First, name your Zap in the top left corner. Then search and choose Replug as your first trigger to start your Zap.
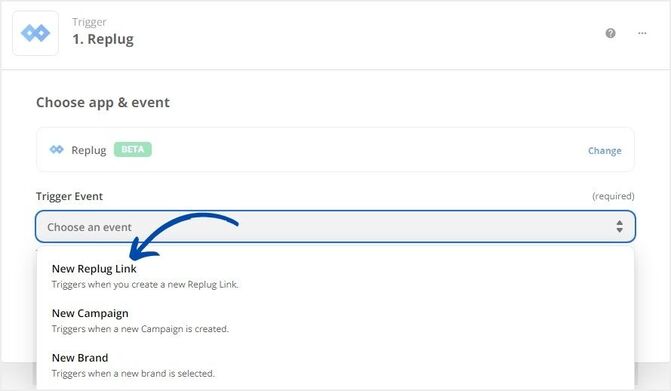
Step 3 Choose Trigger Event
Choose any event from the 3 trigger events (i.e. Brand, Campaigns and Replug Links) and create your first event. We have selected "New Replug Link" as our trigger event.
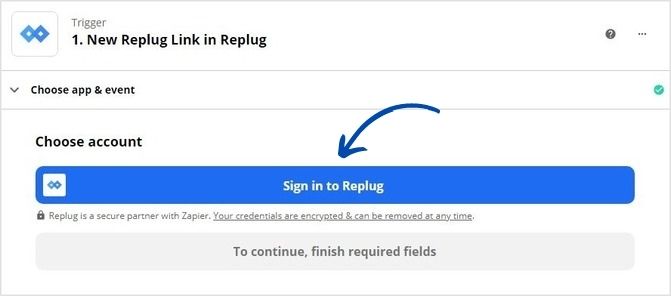
Step 4 Sign-In
The next step is click on Sign in to Replug account.
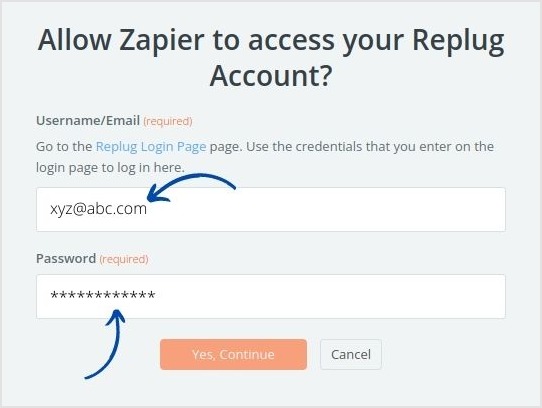
Step 5 Enter Credentials
After clicking on “Sign in”, a pop-up will appear where you can enter your credentials and connect your Replug account to Zapier.
Here’s a short recap of the above process.
From this point, you can proceed further to create your Zaps.
How do I create a Zap for Replug Links and Google Sheets?
Here we have described a case of creating a Zap to automate your Replug workflows on your Google worksheet, choosing the "New Replug Link" event.
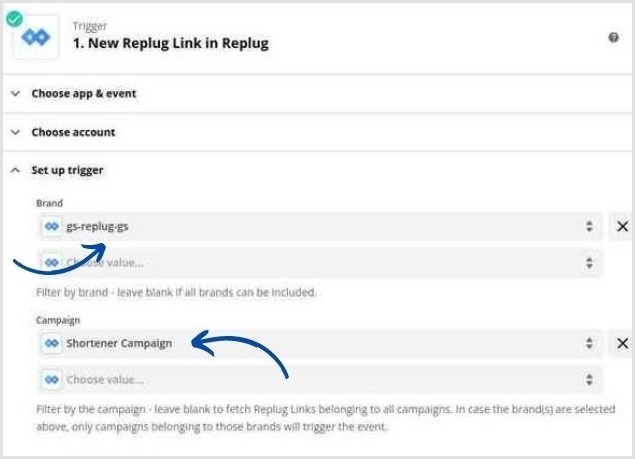
Step 1 Set Up Trigger
Add your Replug brand and campaign in the search fields and set up a trigger as shown in the image below.
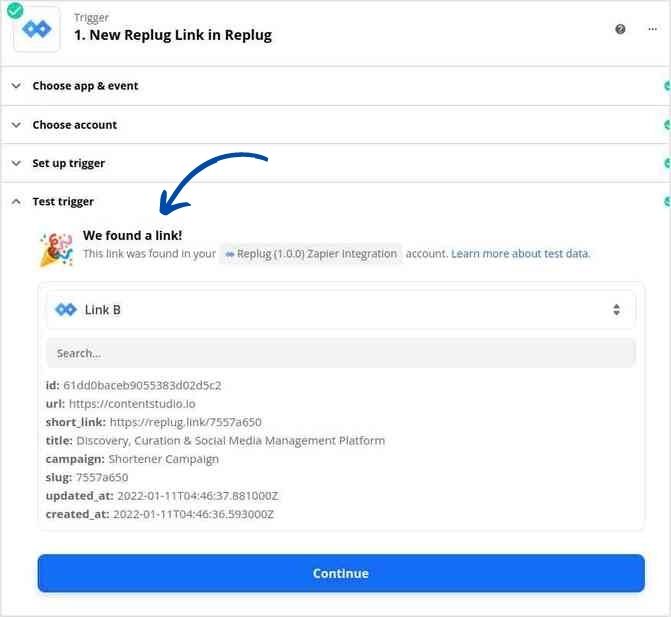
Step 2 Test Trigger
Click on "Test trigger" to test your trigger if it works or not.

Here's a preview of a successful trigger in the image below.
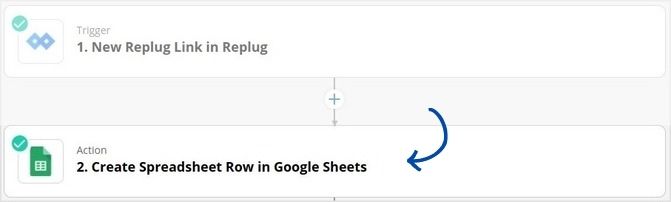
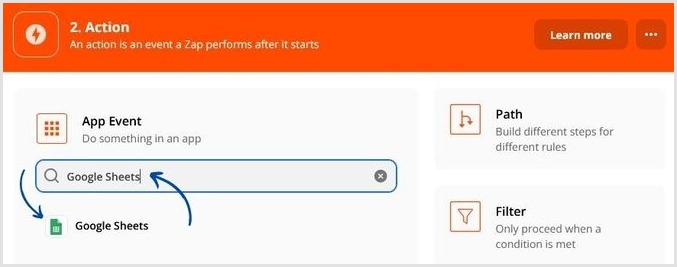
Step 3 Action
Proceed to add a new action by clicking on the plus sign. For this specific case, we have chosen "Create Spread Sheet Row".
Step 4 Select Preferred App Event
Select “Google Sheets” to set up the App Event.
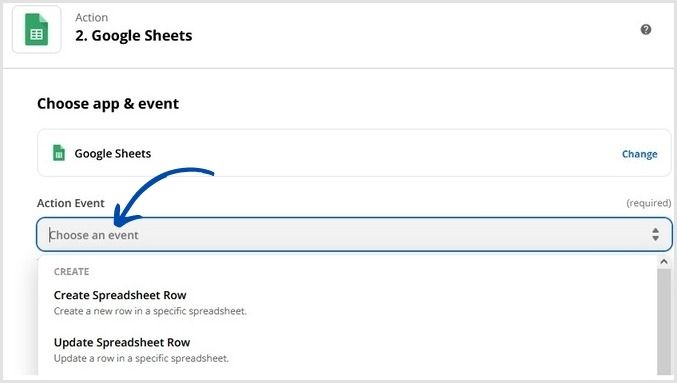
Step 5 Create Action Event
Select "C reate Spreadsheet Row" i n Google Sheets to create an action event
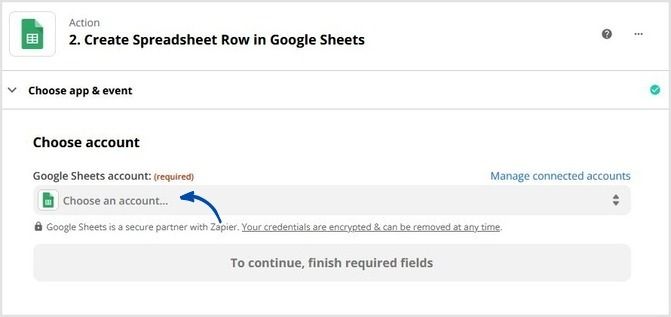
Step 6 Connect Your Google Acount
Connect to your Google account to access your preferred Google Sheet.
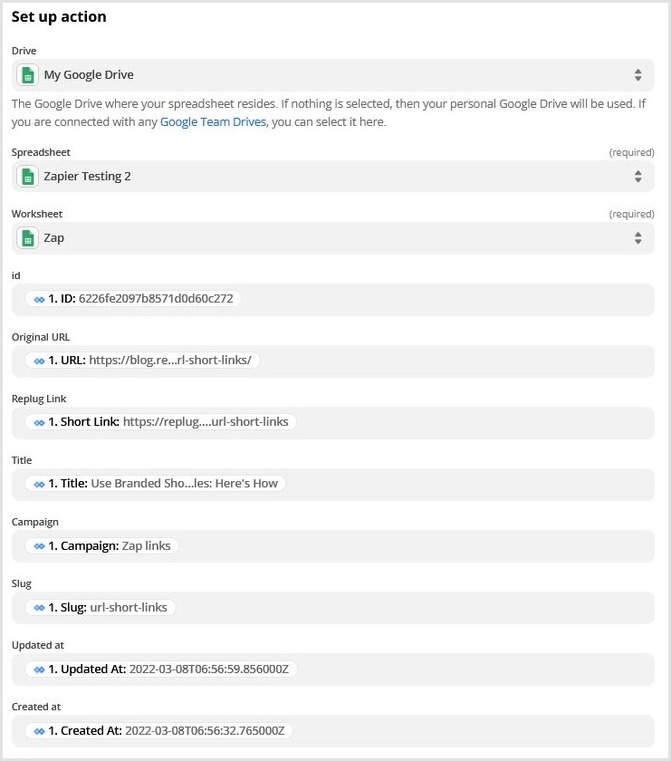
Step 7 Setup Action
Continue to set up your Google Sheet Action.
Select your Google drive for the action. Choose your spreadsheet from the Google drive and worksheet within spreadsheet for the preferred action.
Further, fill each field by selecting the relevant and matching data that you want to replicate on your Google Sheet.
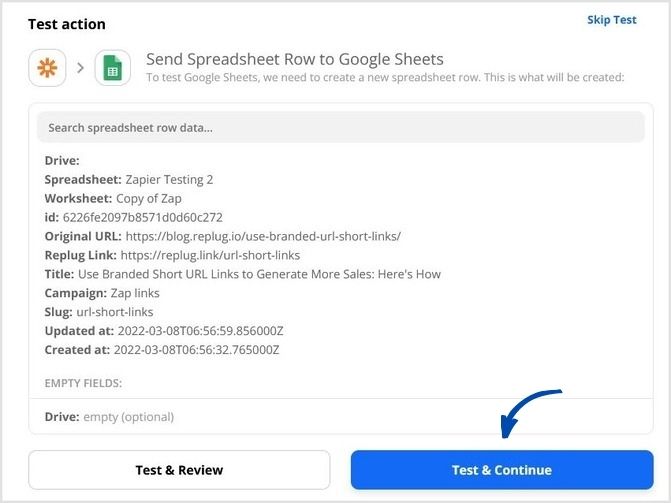
A preview of the selected data is shown in the image below.
Step 8 Test Action
Click on “Test and Continue” to complete and set up the action.
You can also review your action by clicking “Test and Review” to remain on the same page.
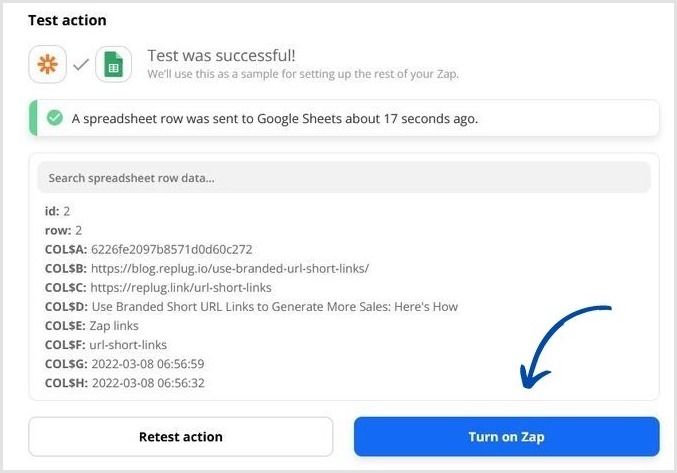
Step 9 Turn on Zap
Click on “Turn on Zap” to complete your Zap.
Step 10 Connecion Completed
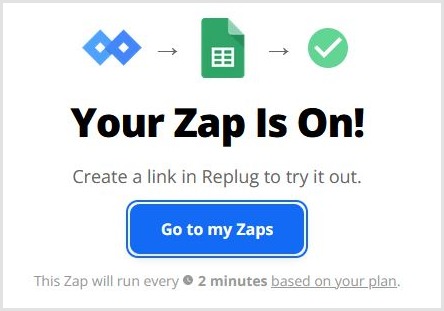
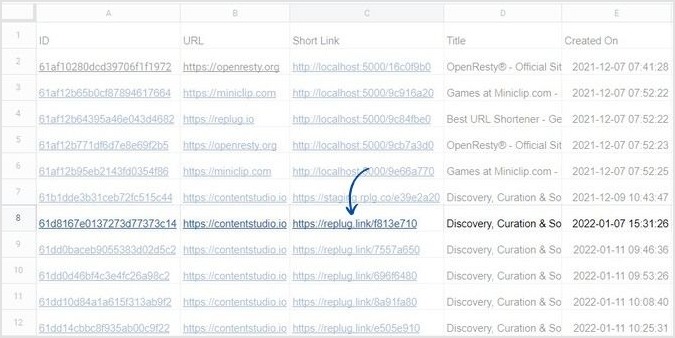
Below is the preview of the automated data of New Replug Link copied to your Google worksheet.
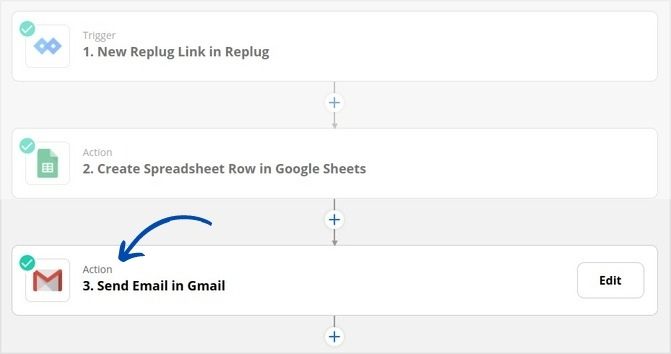
That's not all! You can create more zaps for the same trigger event.
That's all from our side. Hurry up! connect Replug with Zapier and start creating Zaps to automate your tasks from this useful integration.
Was this article helpful?